Introduction to App Builder
Build AI apps in minutes—no coding required.
MarkovML's App Builder is a powerful tool designed to simplify the creation of AI-driven applications. With no-code setup and a user-friendly interface, anyone—whether you are a developer or not—can build custom Generative AI applications in just a couple of minutes.
One compelling use case for MarkovML’s App Builder is when your team is gearing up to promote a new product for a marketing campaign. With the app builder, you can create handy Gen AI apps to automate various tasks. Instead of rewriting prompts for similar tasks over and over, you can save your instruction prompts as apps and reuse them anytime you need.
For example, you might build a Social Media Post Creator App that generates catchy posts, an Email Campaign Generator App to craft personalized email templates for your target audience, and a Content Planner App to assist in organizing and scheduling all your marketing content.
Once built, your team can access these apps directly from the App Store—there is no need to revisit the app builder. Just find your apps in the App Store and launch them!
Build and publish your apps to the App StoreAnyone with access to your workspace can directly access and use the AI Apps you have built from the "Custom Apps" tab in the App Store.
How it works
Step 1: Create your App
When you are ready to build your app, click on the Create New App button. Start by giving it a name and adding a description. The description helps users quickly understand what your app does. For example, if you are creating a LinkedIn Post Generator App, you might describe it as: “Create a LinkedIn post for your social media campaign.” This sets clear expectations for users right from the start.
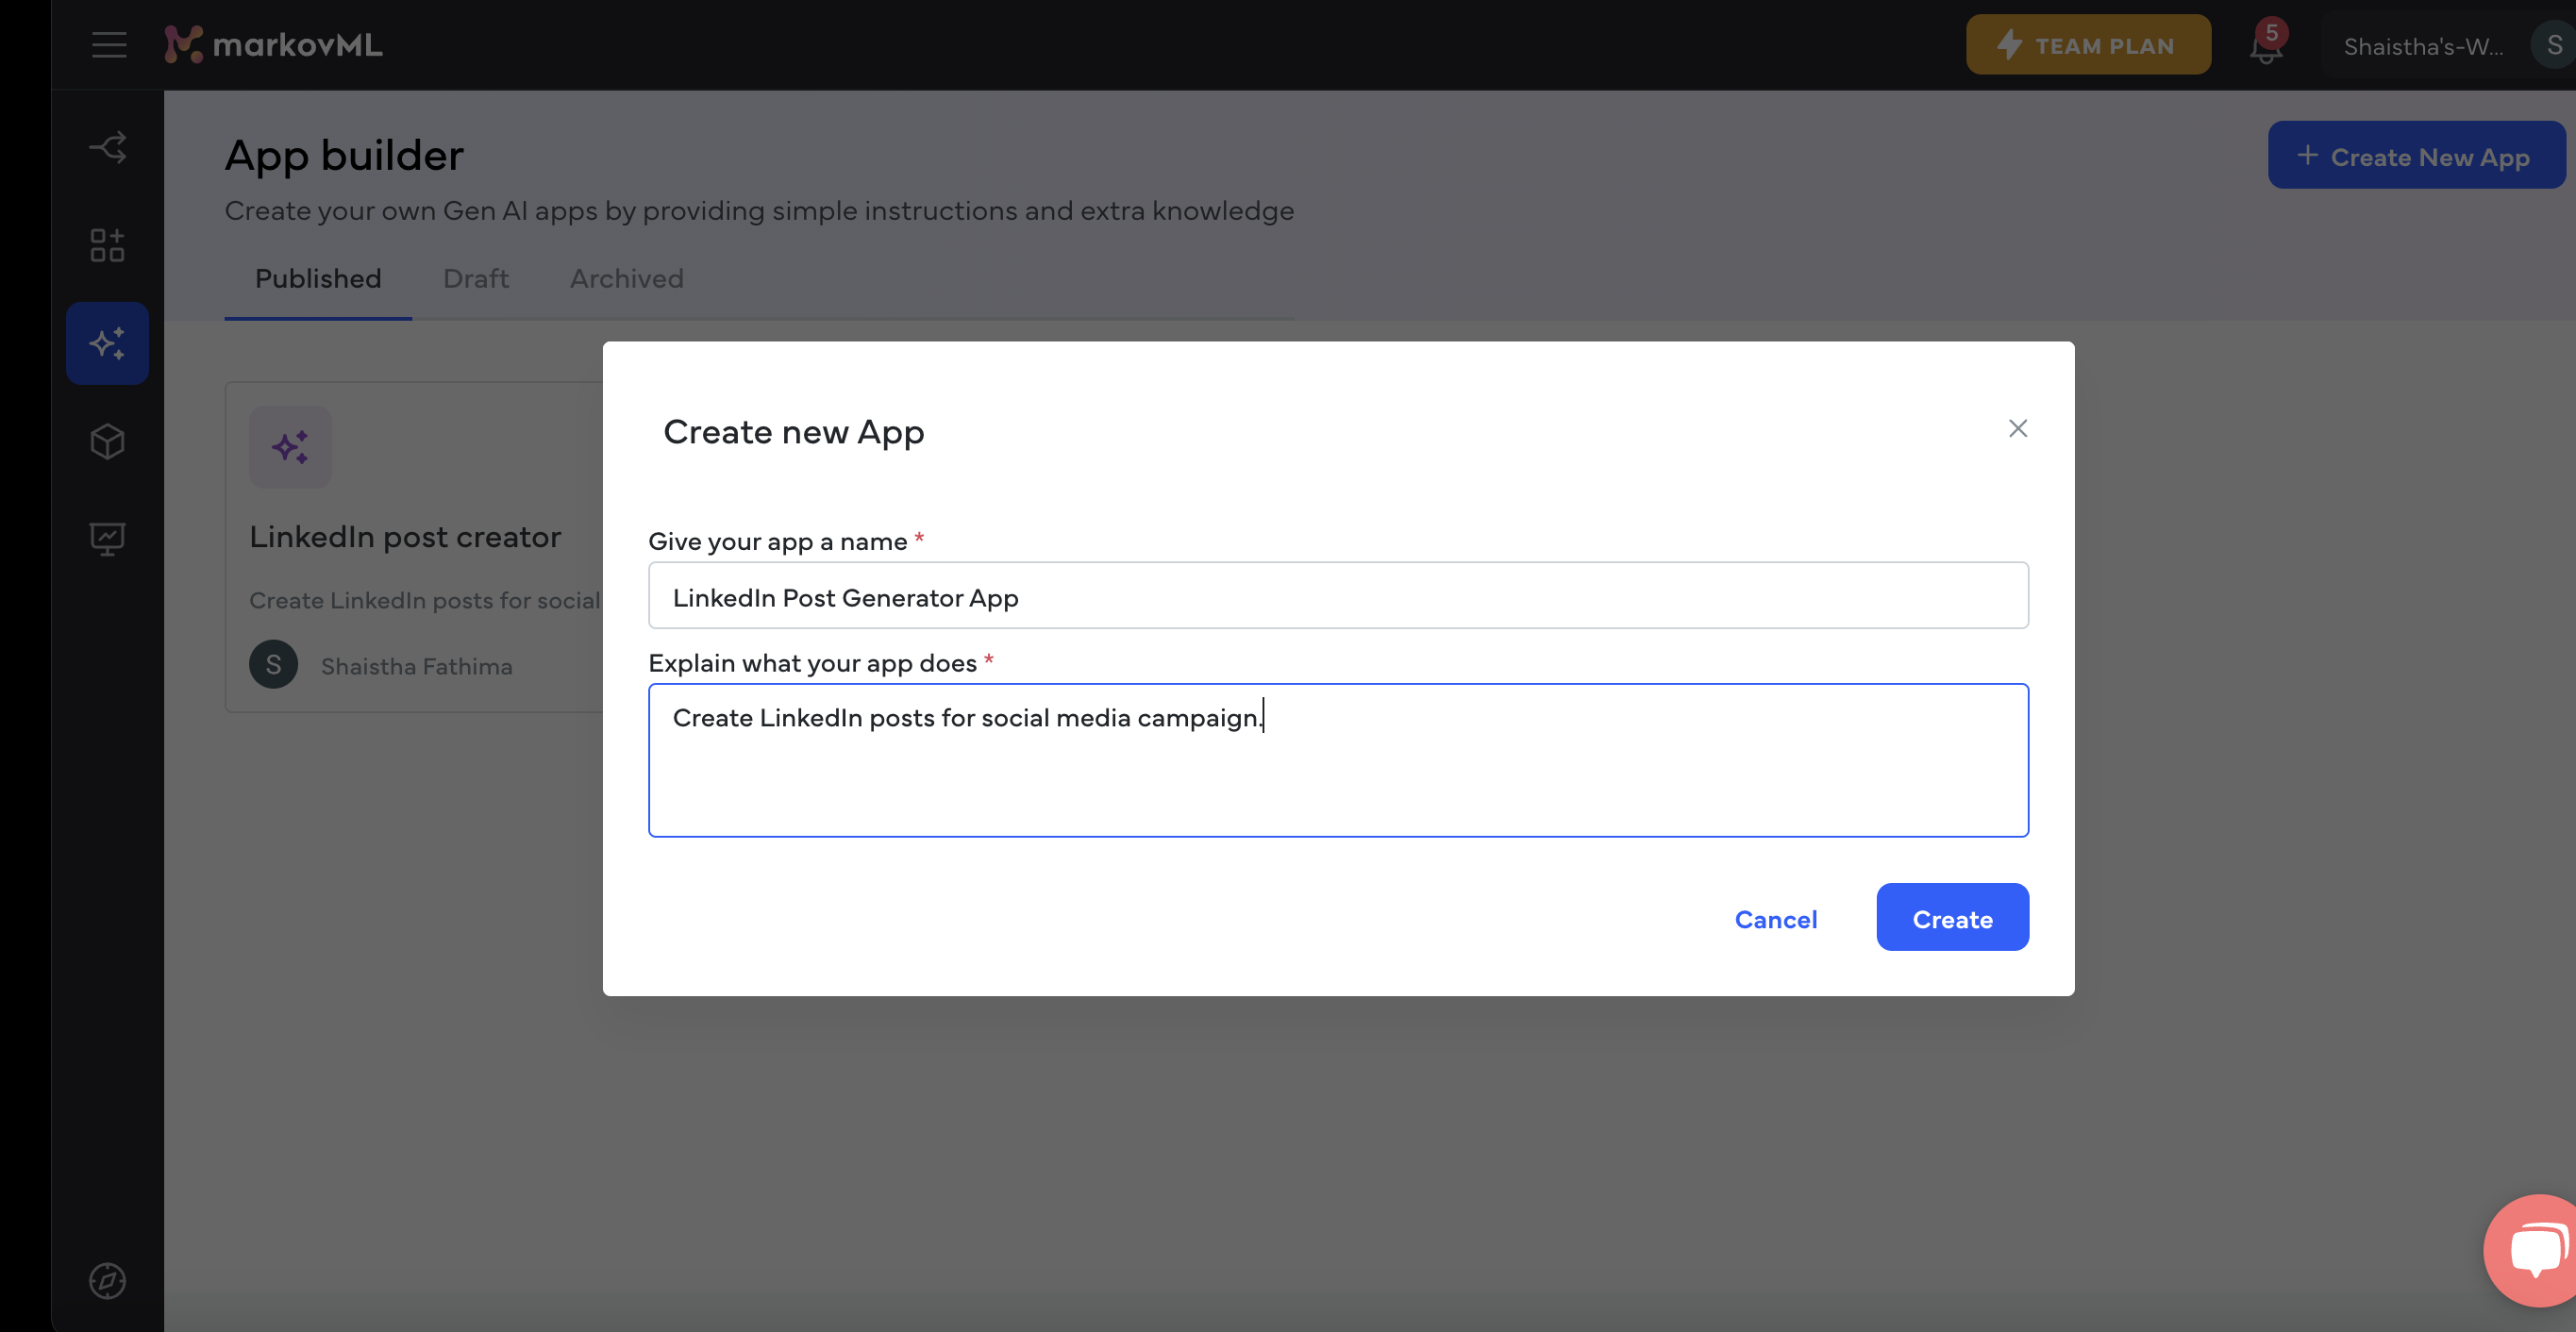
A pop-up requesting for app name and description to create a new app.
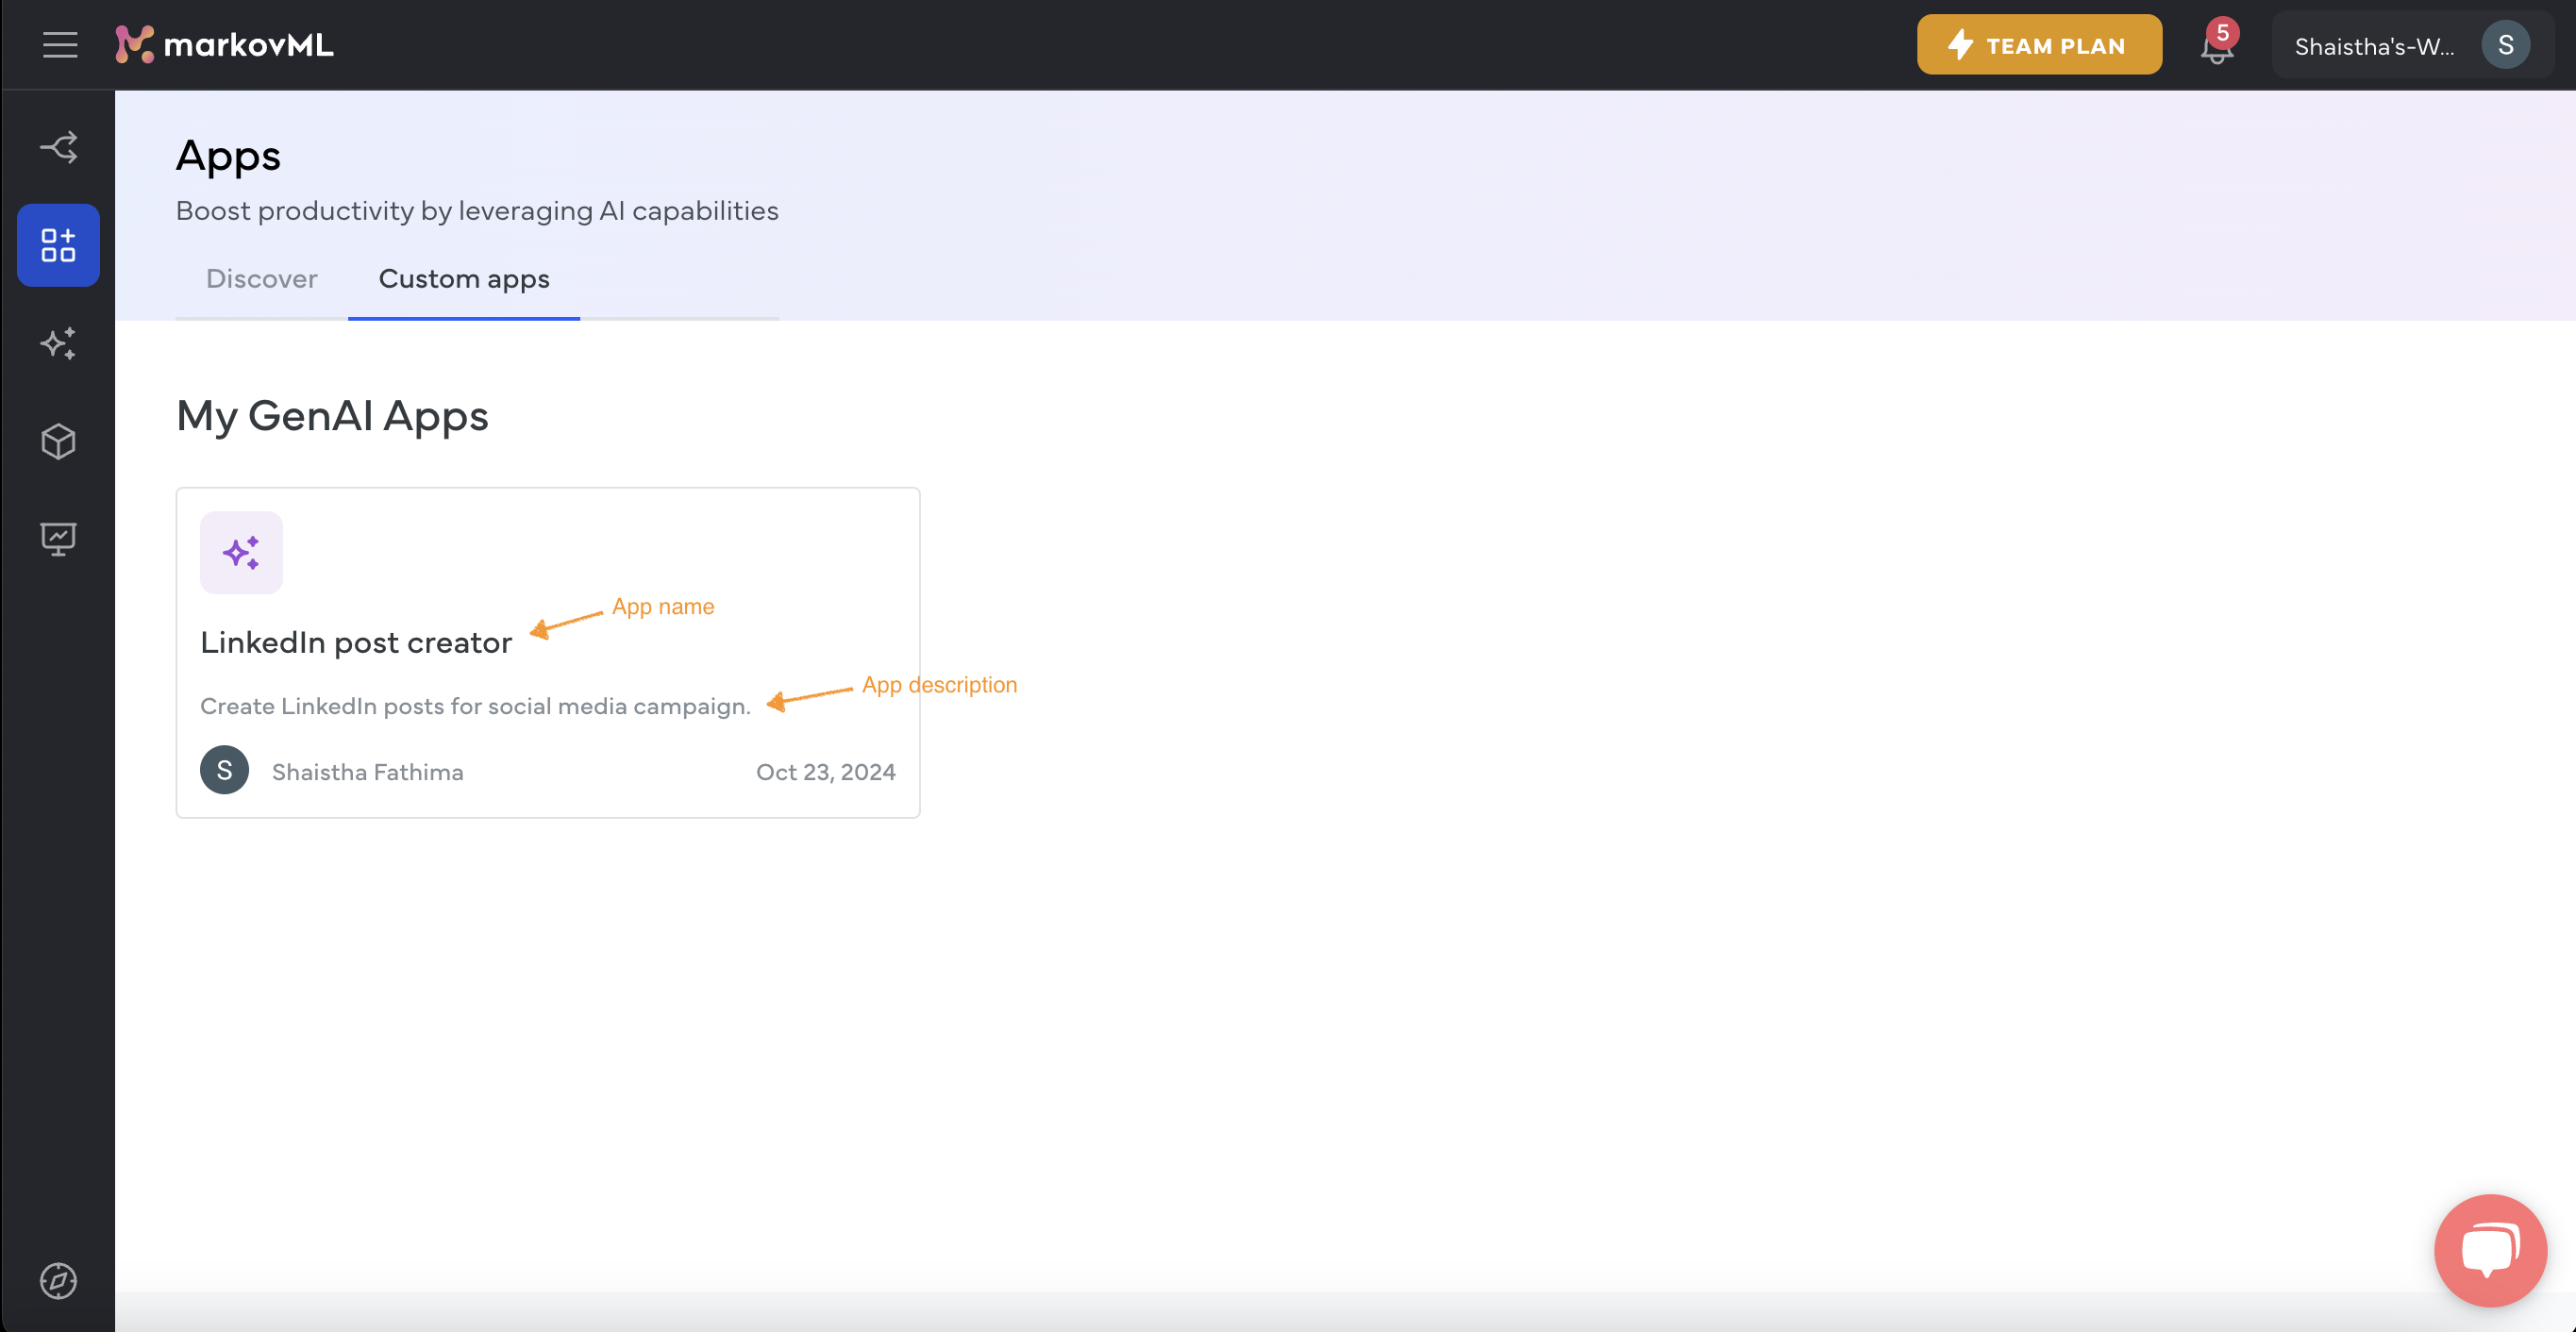
In the App Store, an app is displayed with its name and description for users.
Step 2: Setup your app on the Builder Page
Once you create your app, you are led to the builder page. The builder page is where you set up how the AI will generate outputs. It has three main sections: the prompt section, the placeholder section, and the playground.
Setup instruction prompt
The instruction prompt section, as shown in the image below, is where you provide specific prompts/ instructions for the AI.
For instance, if you are creating a LinkedIn post generator app, you could use an instruction prompt like, “Create a LinkedIn post based on the given requirements and context. Use a one-on-one conversational yet professional tone, and include relevant emojis.” This tells the AI exactly what you want.
MarkovML provides a built-in AI prompt generator that can help you refine your prompts for even better results. If you want to learn more about crafting effective prompts, check out the "How to Generate AI Prompt" page.
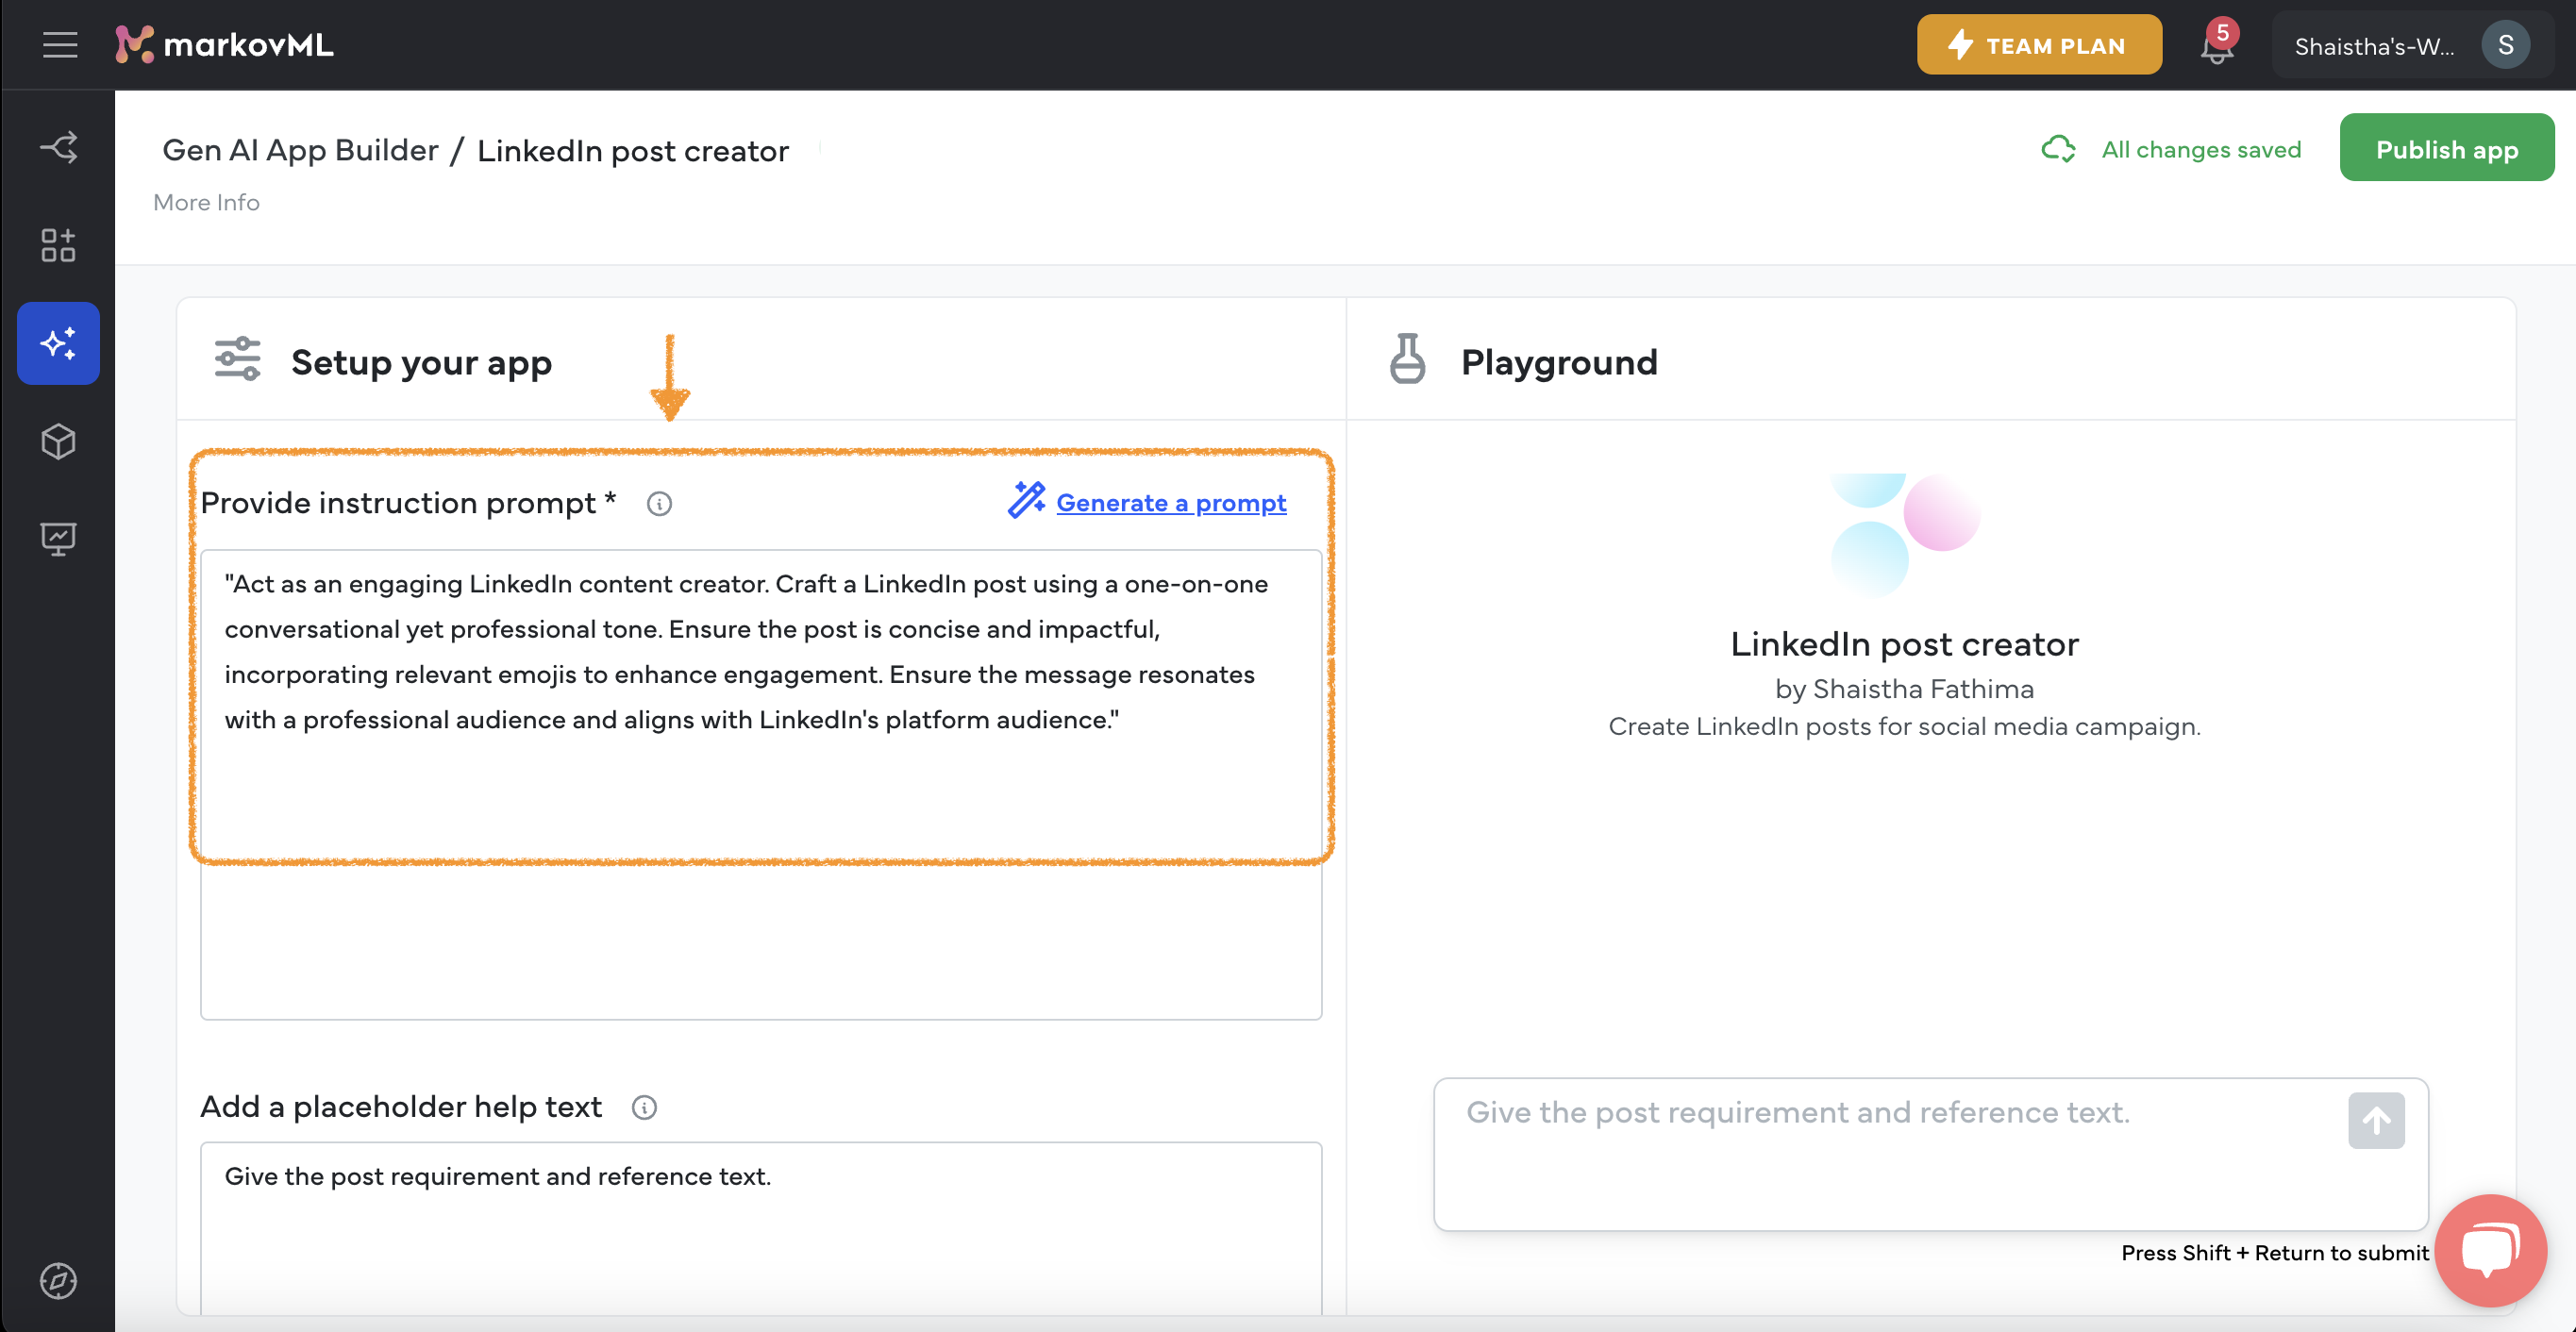
The instruction prompt section on the builder page.
Add the placeholder
Placeholders allow users to input specific details without changing the main prompt. In your LinkedIn post generator, placeholders might look like this: "Give the post requirement and reference text". This way, you can keep the core prompt reusable and easily update it with different details to get the desired results.
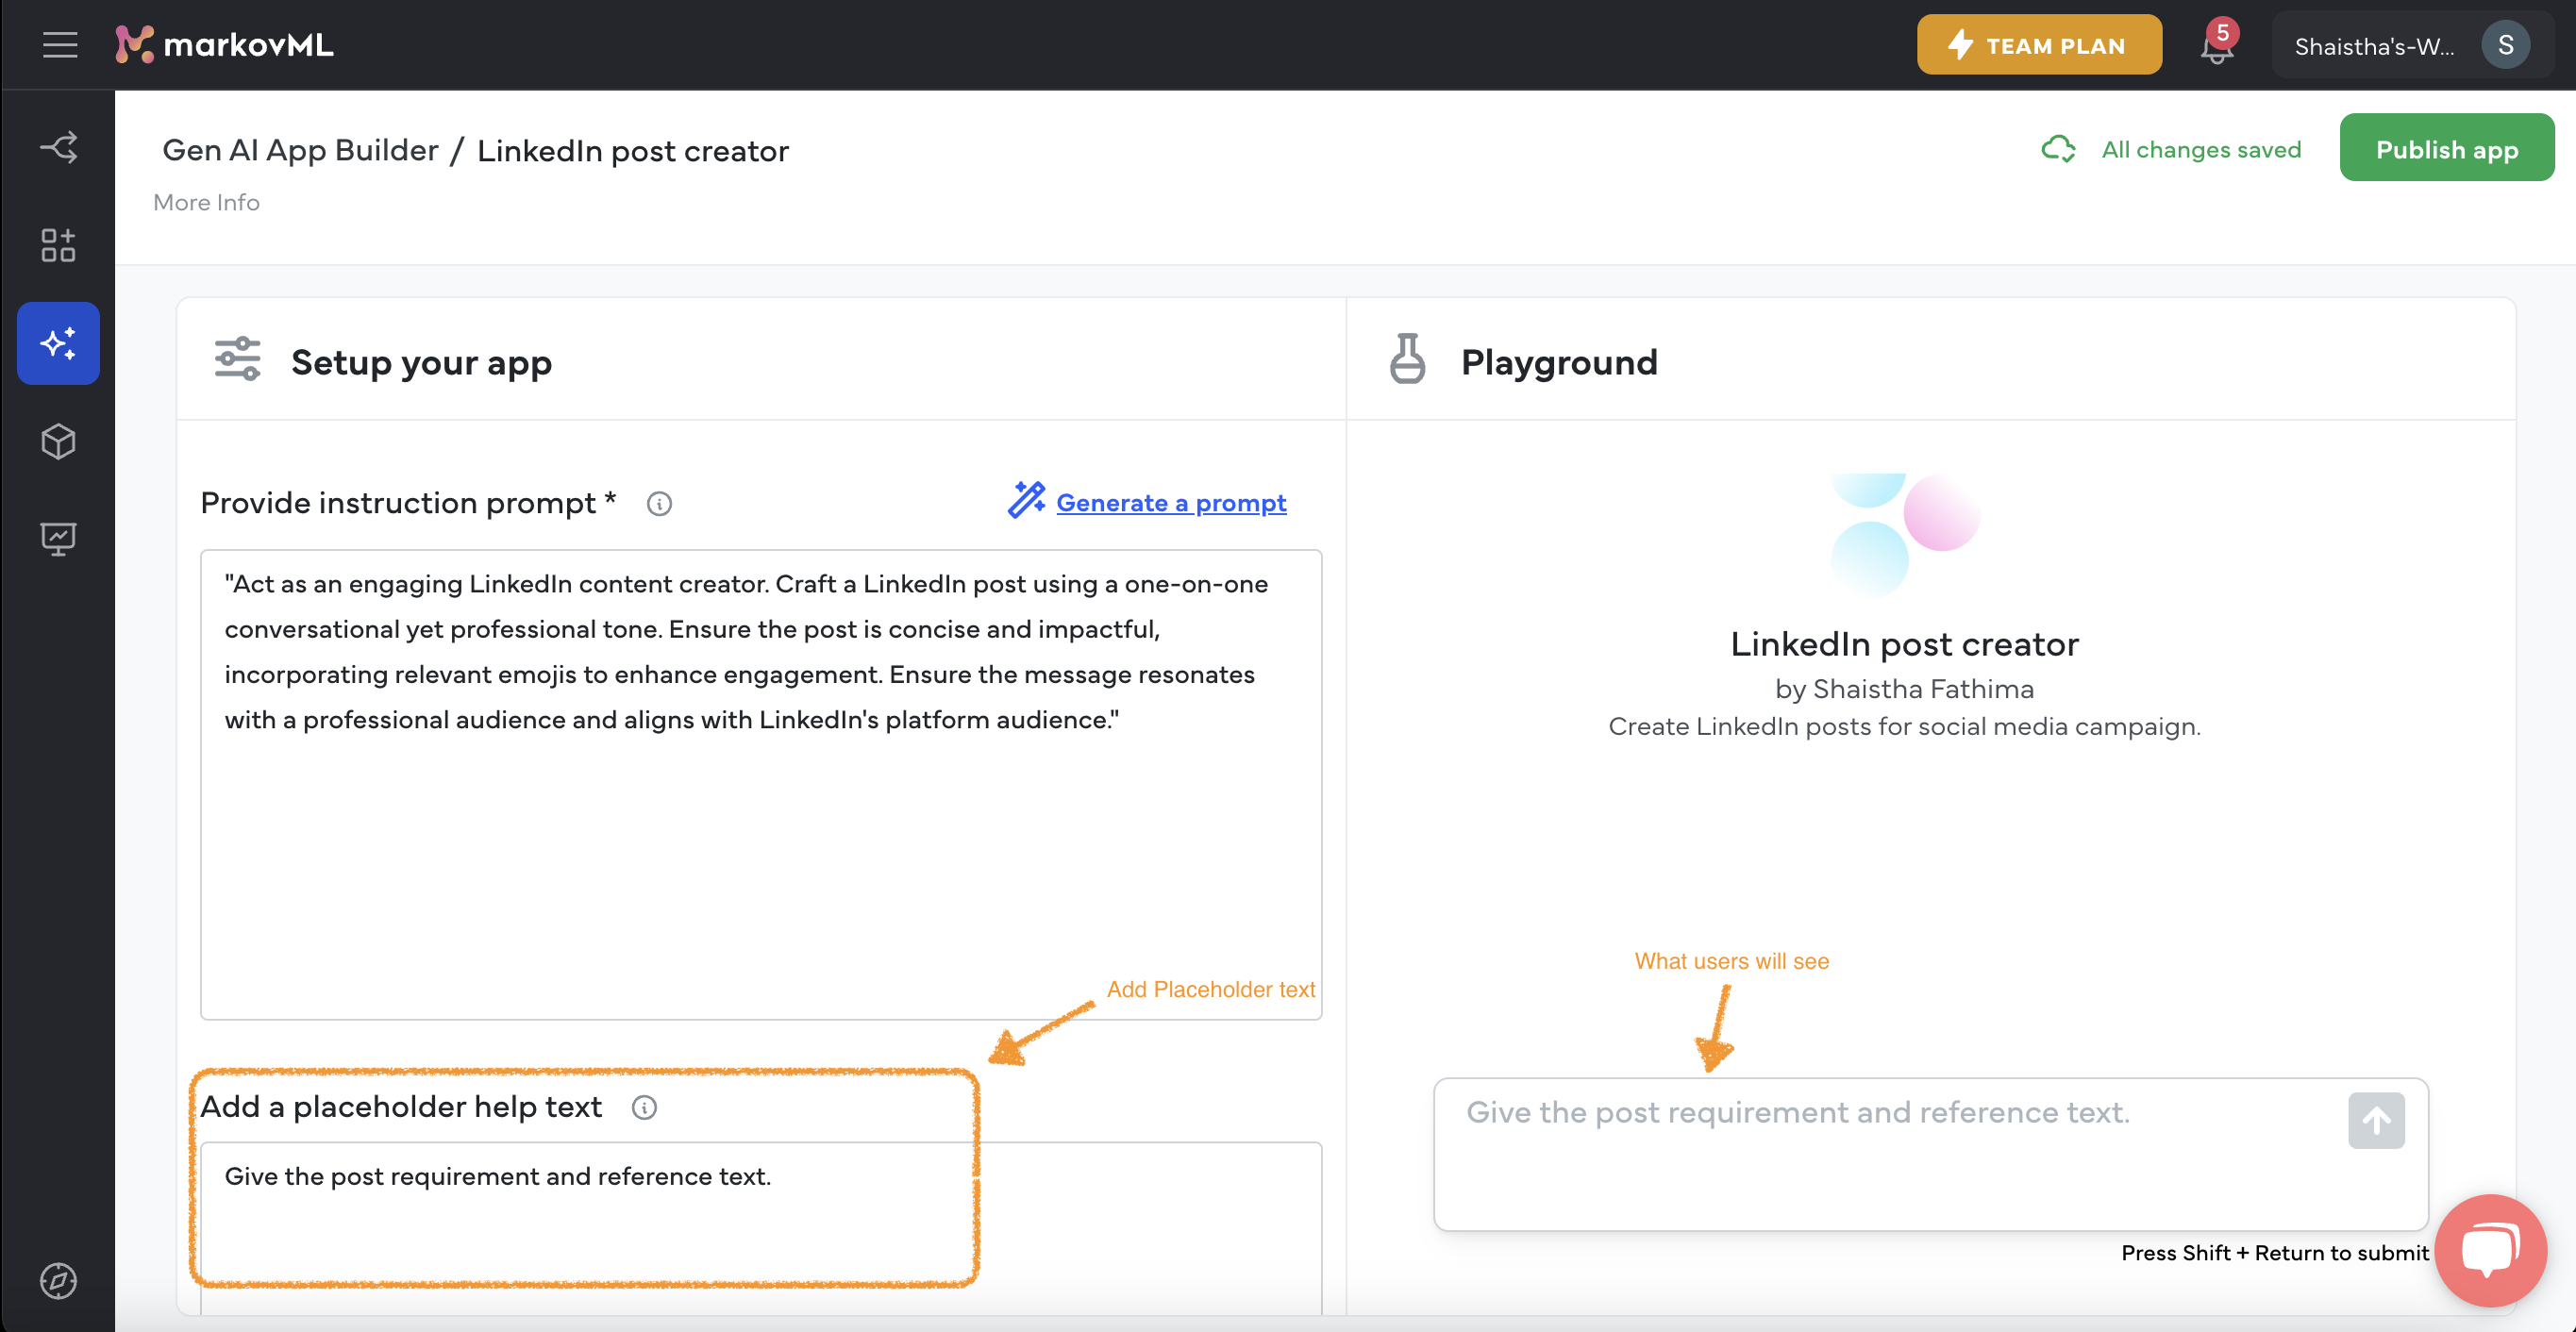
Section to add the placeholder on the builder page.
NoteUsing prompts and placeholders together gives users the flexibility to generate content without rewriting prompts every time.
Test in the Playground
Before you publish, use the Playground to test your app. This area lets you run the app with different inputs to see how it performs. It’s your chance to tweak the prompt or placeholders based on what the AI produces. Think of the Playground as your testing ground—experiment here to make sure your app meets your expectations.
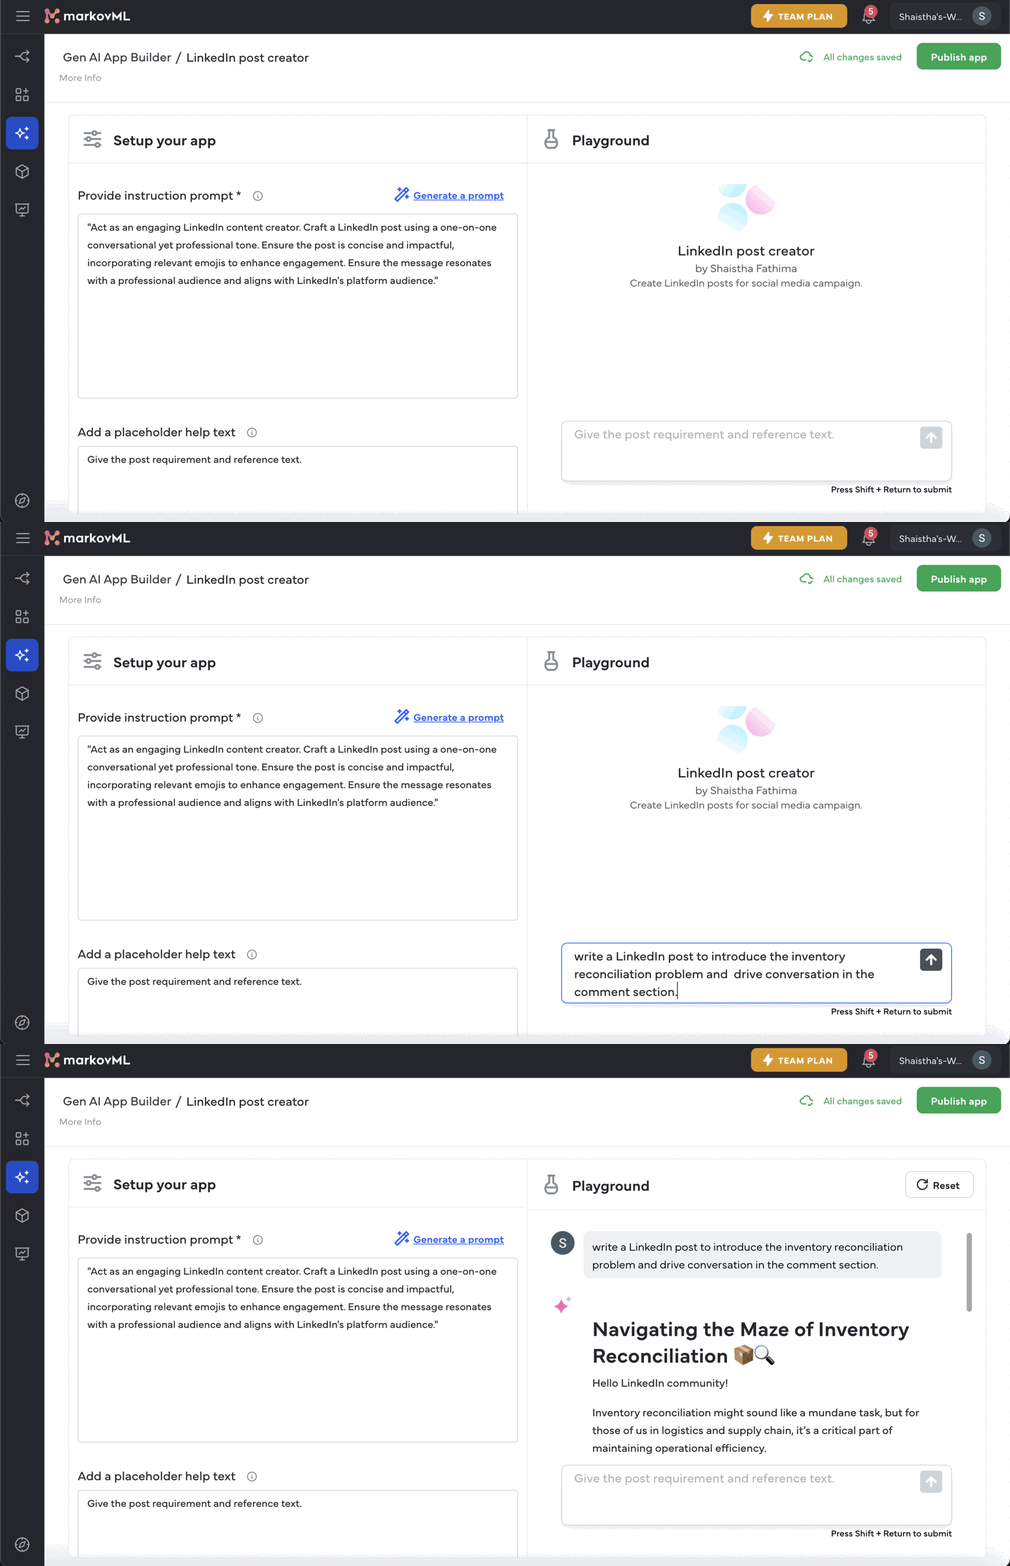
Testing the app in the playground.
Step 3: Publish your App to the App Store
Once everything looks good, you can publish your app to the MarkovML App Store, making it accessible to anyone you have shared your workspace with. Your team can easily find it under the Custom Apps tab, as shown below. This way, everyone has a simple way to launch and use your custom-built apps without needing to return to the App Builder.
You can also explore a wide range of enterprise-grade AI applications in the MarkovML app store.
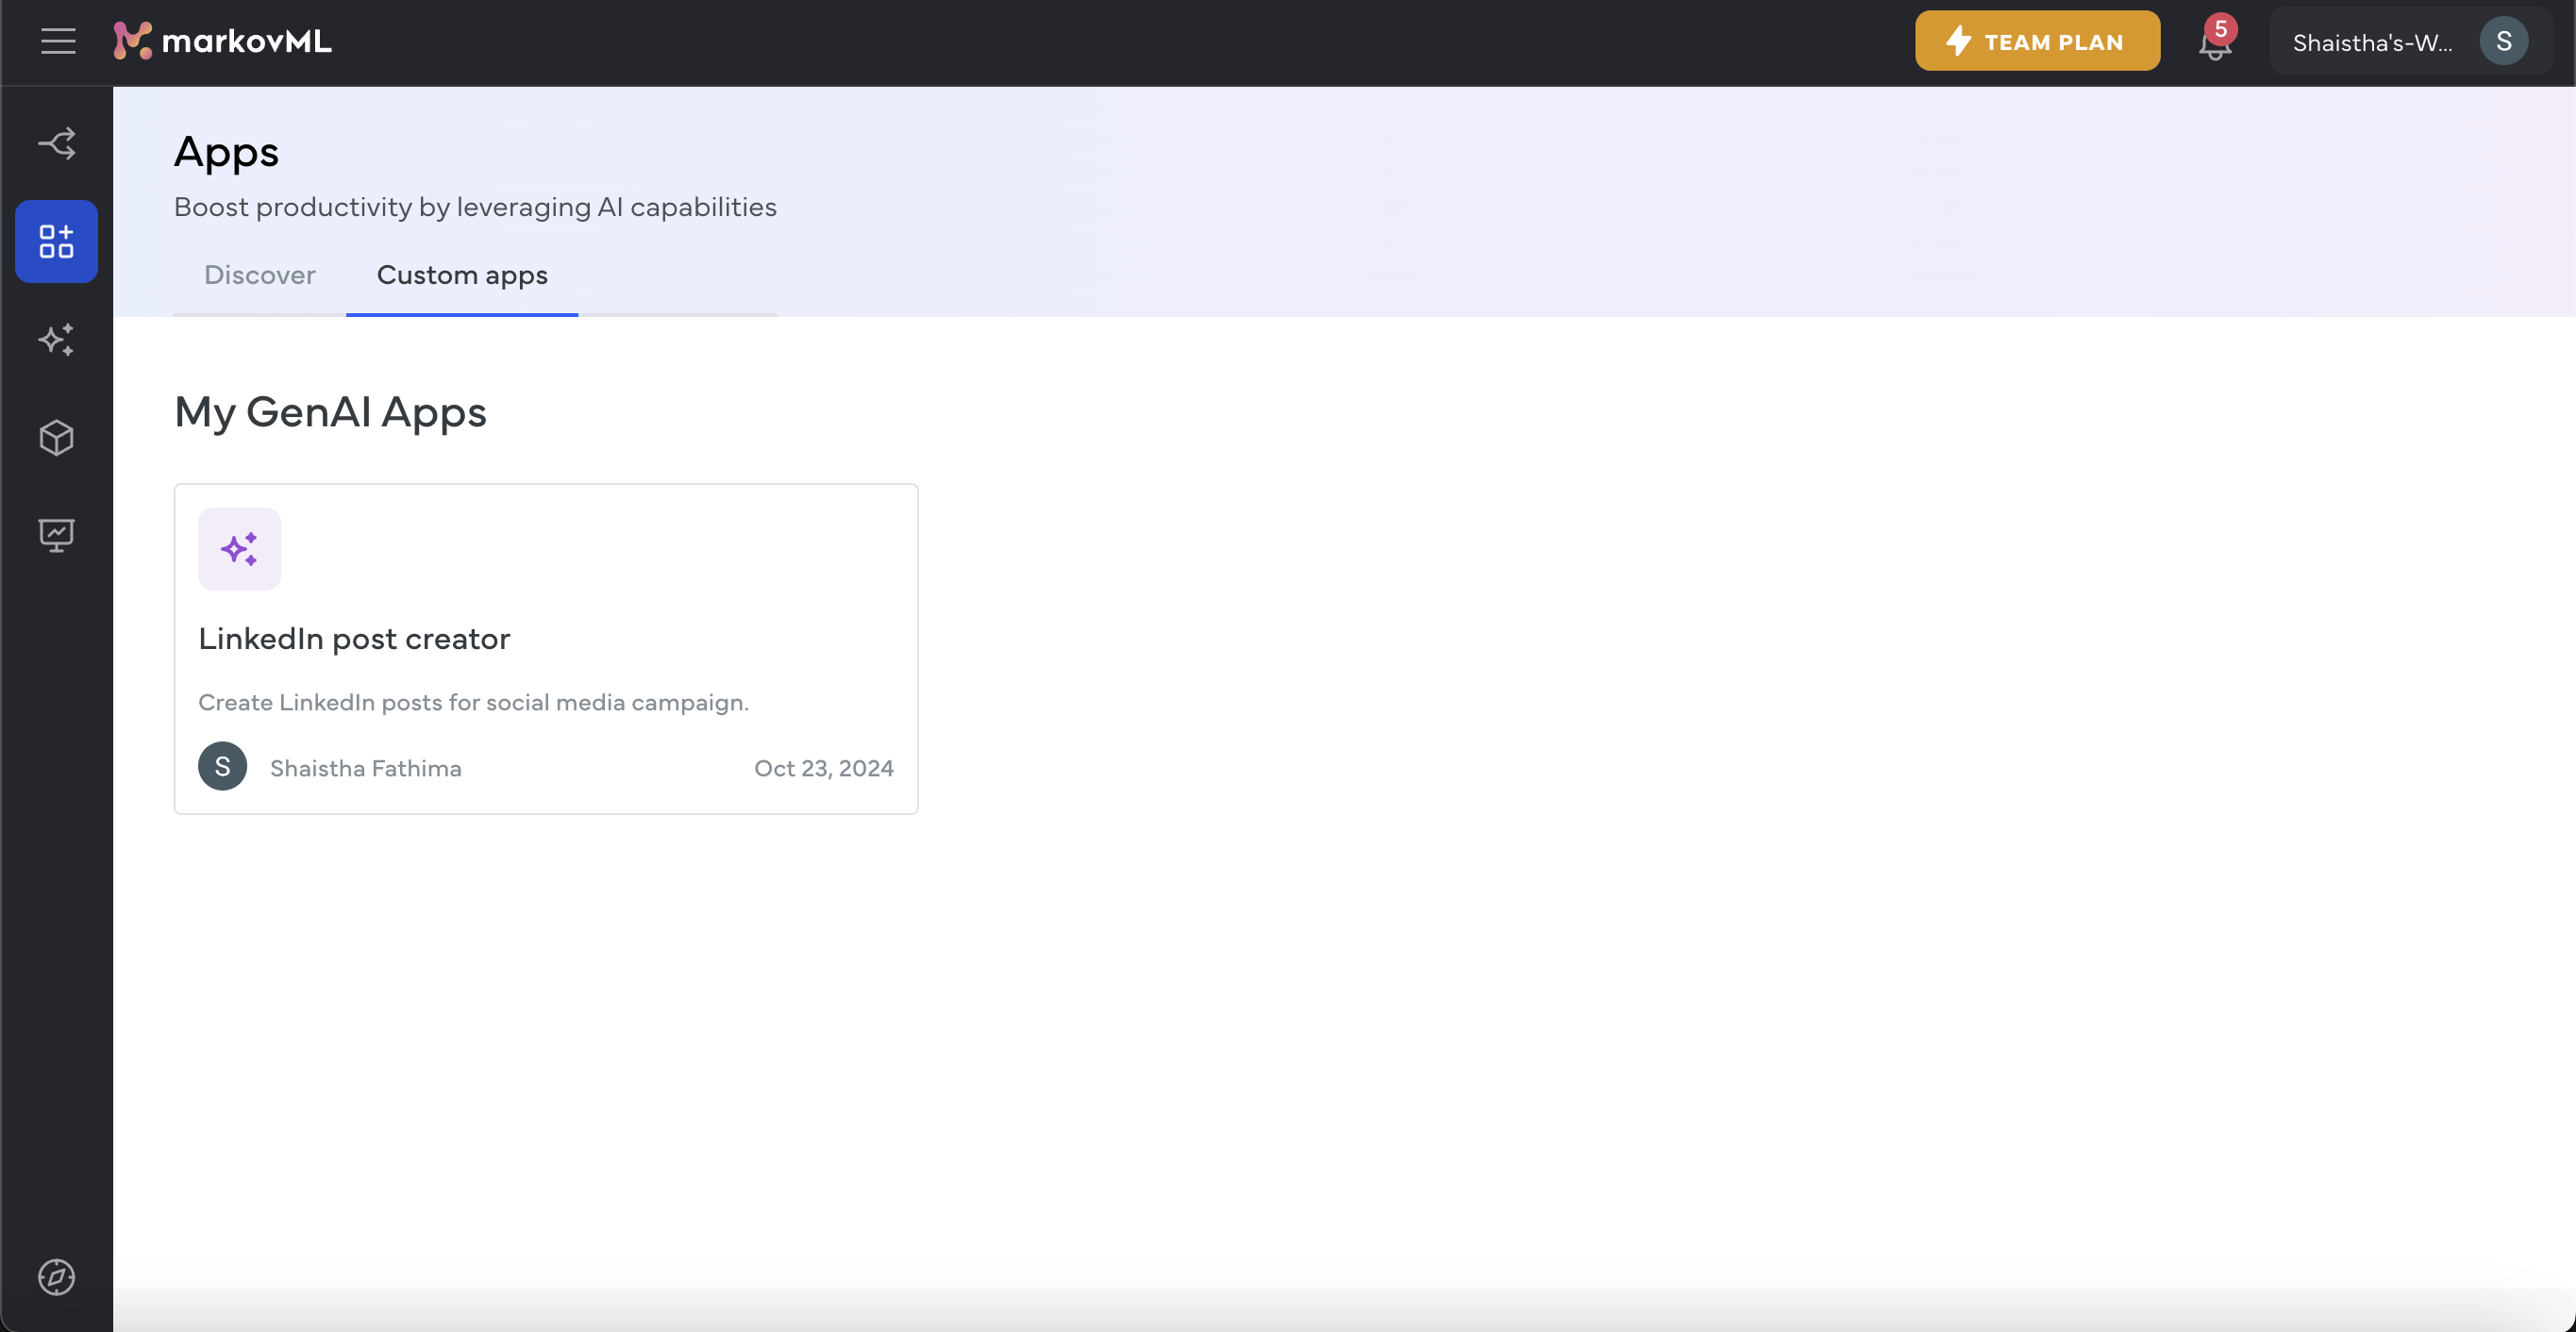
Your custom-built app in the App Store
That's it! You have built your own Gen AI app, and guess what? You didn't need any special skills—just a few minutes and a bit of creativity.
Updated about 1 month ago
